


在 Selldone 上使用 Resend SMTP 发送商店邮件
发表于:日期
想让你的商店使用自己的域名给客户发送邮件(订单收据、登录验证码、通知等)?下面是一份可直接复制粘贴的清晰指南。无需插件、无需编程——只需一次 DNS 配置和在 Selldone 中填写一份表单。
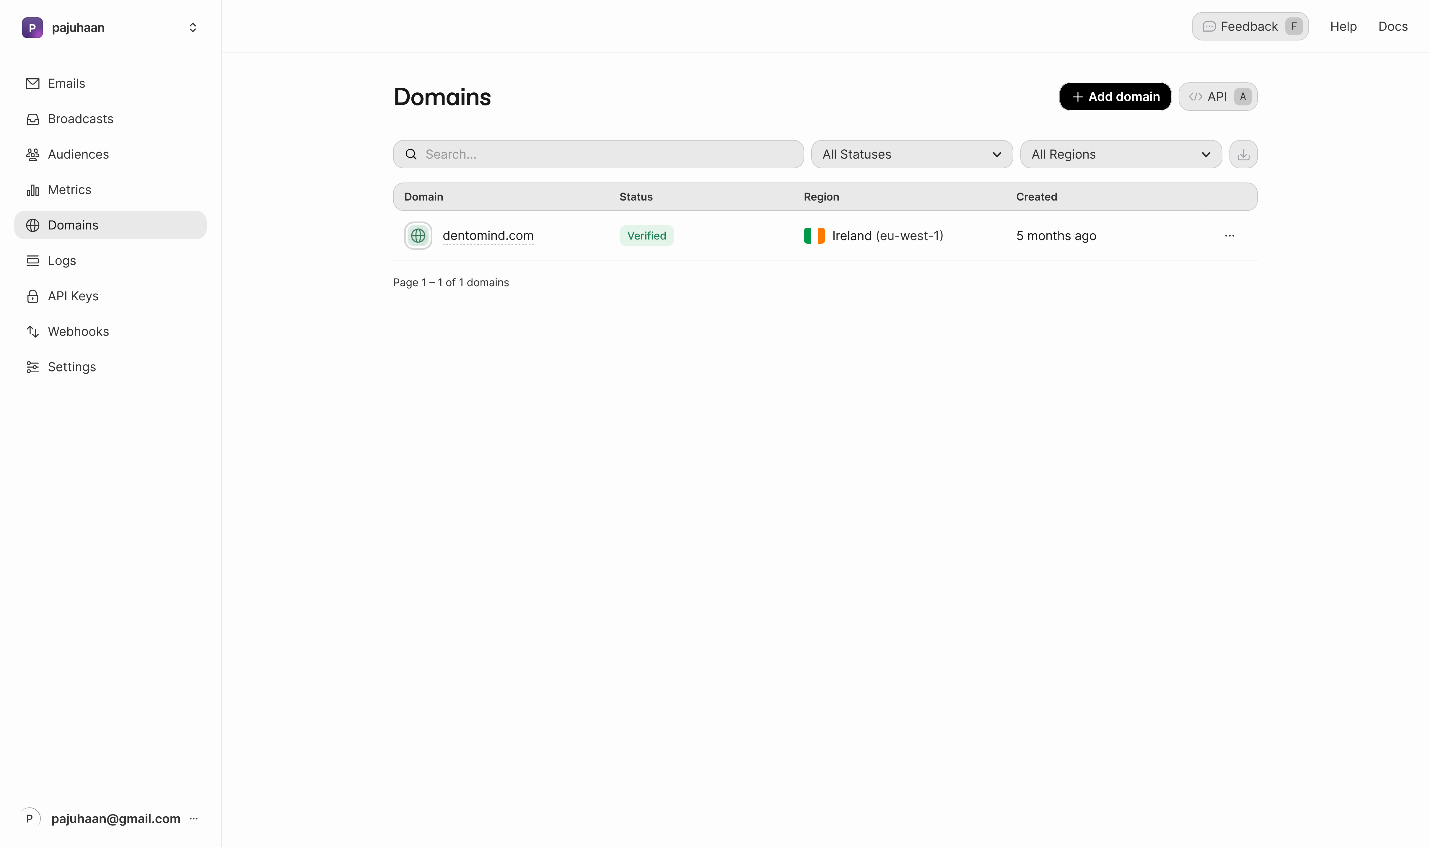
点击 Add domain,输入你的商店域名(例如:nihaodian.cn)。
当记录生效且正确时,Resend 的 Domains 页面上域名状态会变为 Verified。
小贴士
使用说明
你需要准备的
- 一个 Selldone 商店
- 可以访问你的域名 DNS(例如 Cloudflare 或类似服务)的权限
- 在 https://resend.com 注册一个账号(邮箱服务)
步骤 1 — 在 Resend 创建一个免费账号
在 resend.com 注册并打开 Domains 页面。步骤 2 — 在 Cloudflare 验证你的域名
Resend 会显示一组 DNS 记录(SPF、DKIM 等)。在你的域名的 Cloudflare 中添加这些记录。当记录生效且正确时,Resend 的 Domains 页面上域名状态会变为 Verified。
小贴士
你发送邮件时使用的邮箱地址必须属于这个已验证的域(例如 [email protected])。不要使用 Gmail 或其他免费邮箱地址。
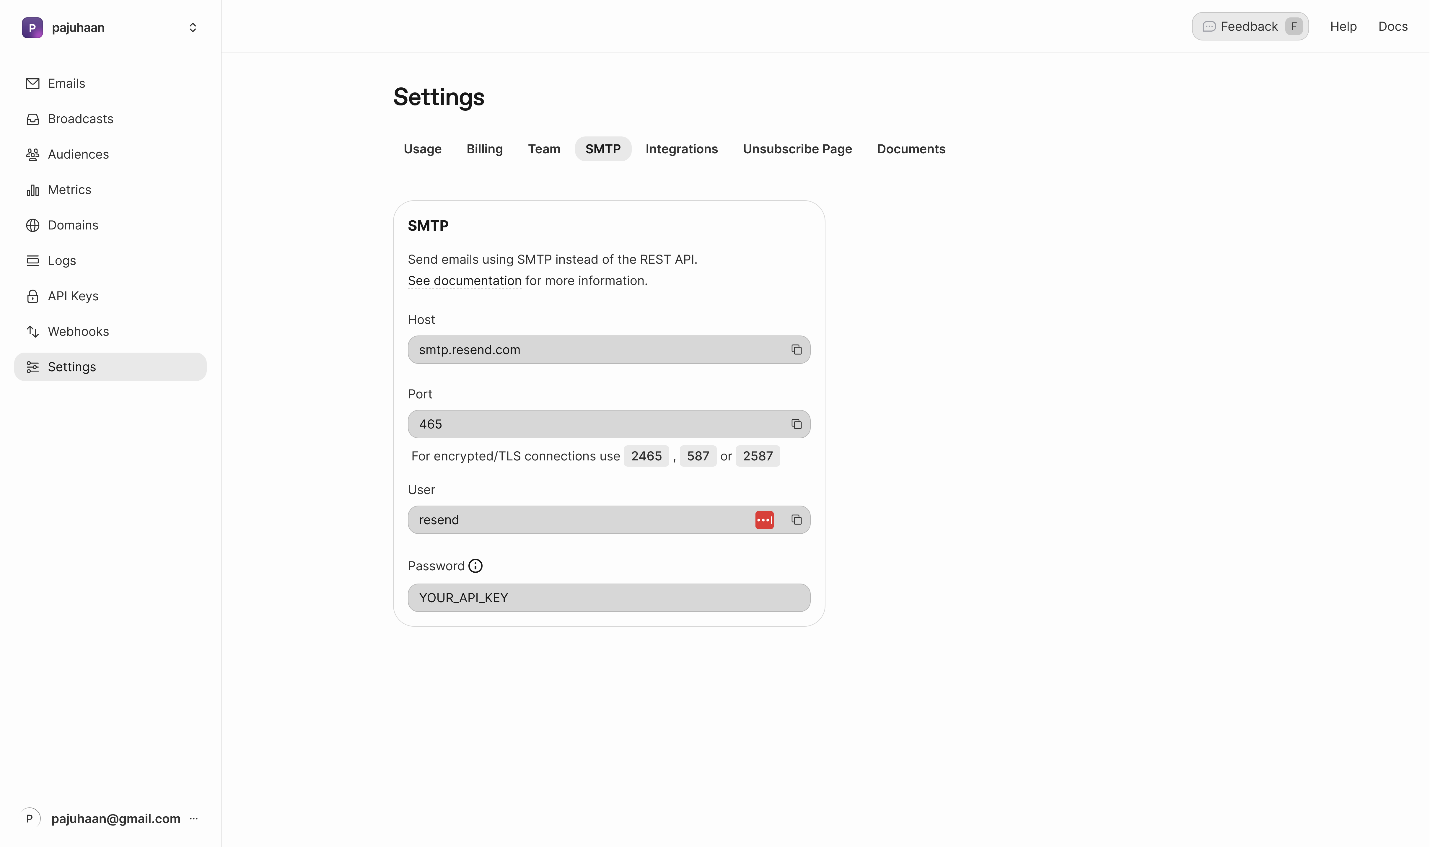
步骤 3 — 获取 Resend 中的 SMTP 配置
在 Resend 中打开 Settings → SMTP。你会看到主机、端口和固定的用户名。使用说明
· Host: smtp.resend.com
· Username: resend
· Port 与 加密方式:
· 465 使用 SSL,或
· 587 使用 TLS/STARTTLS
· Password: 使用你接下来创建的 Resend API key
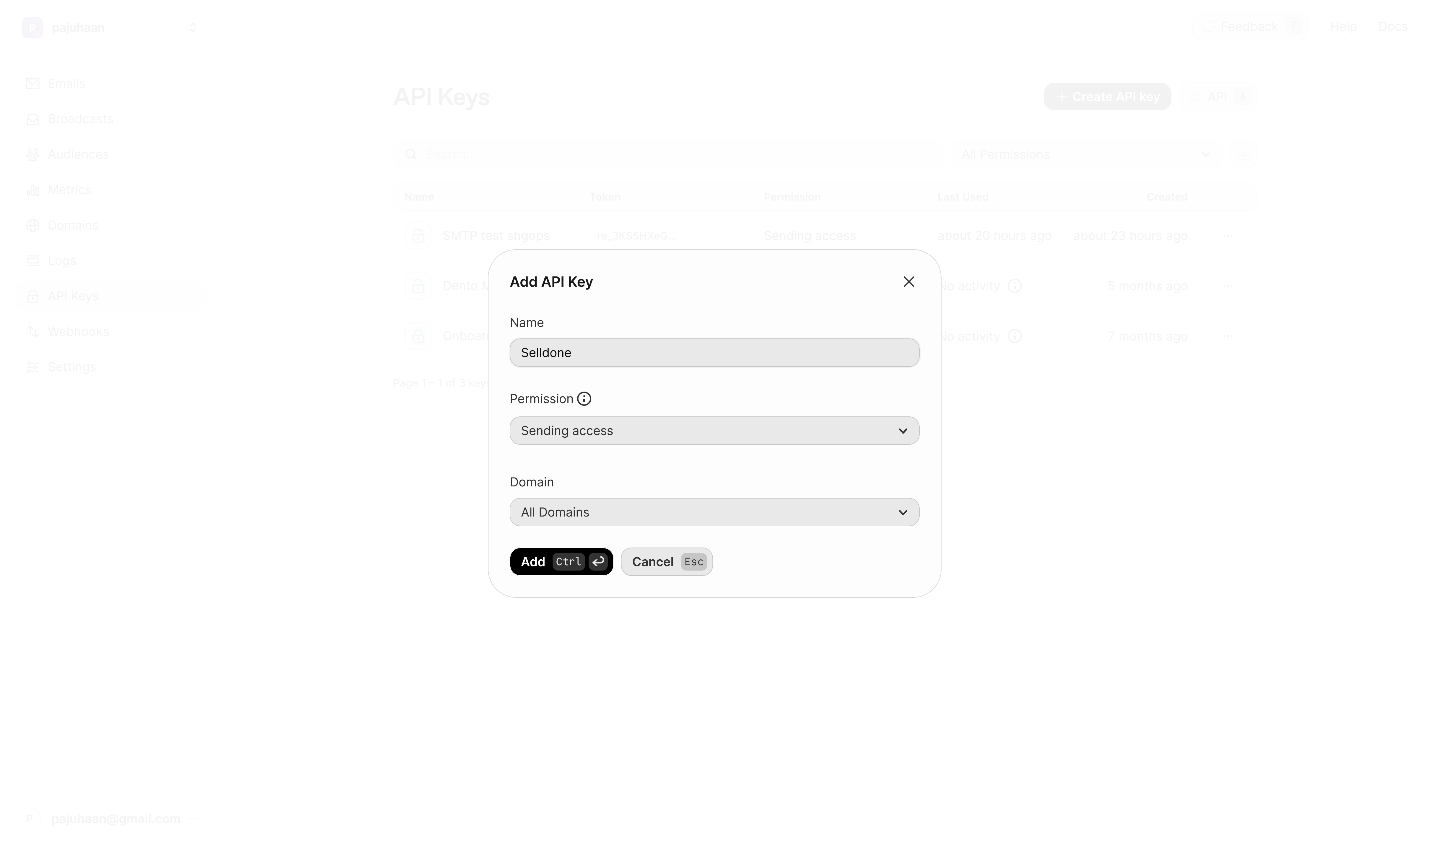
步骤 4 — 在 Resend 创建 API 密钥
在 Resend 中前往 API Keys,然后点击 Create API key。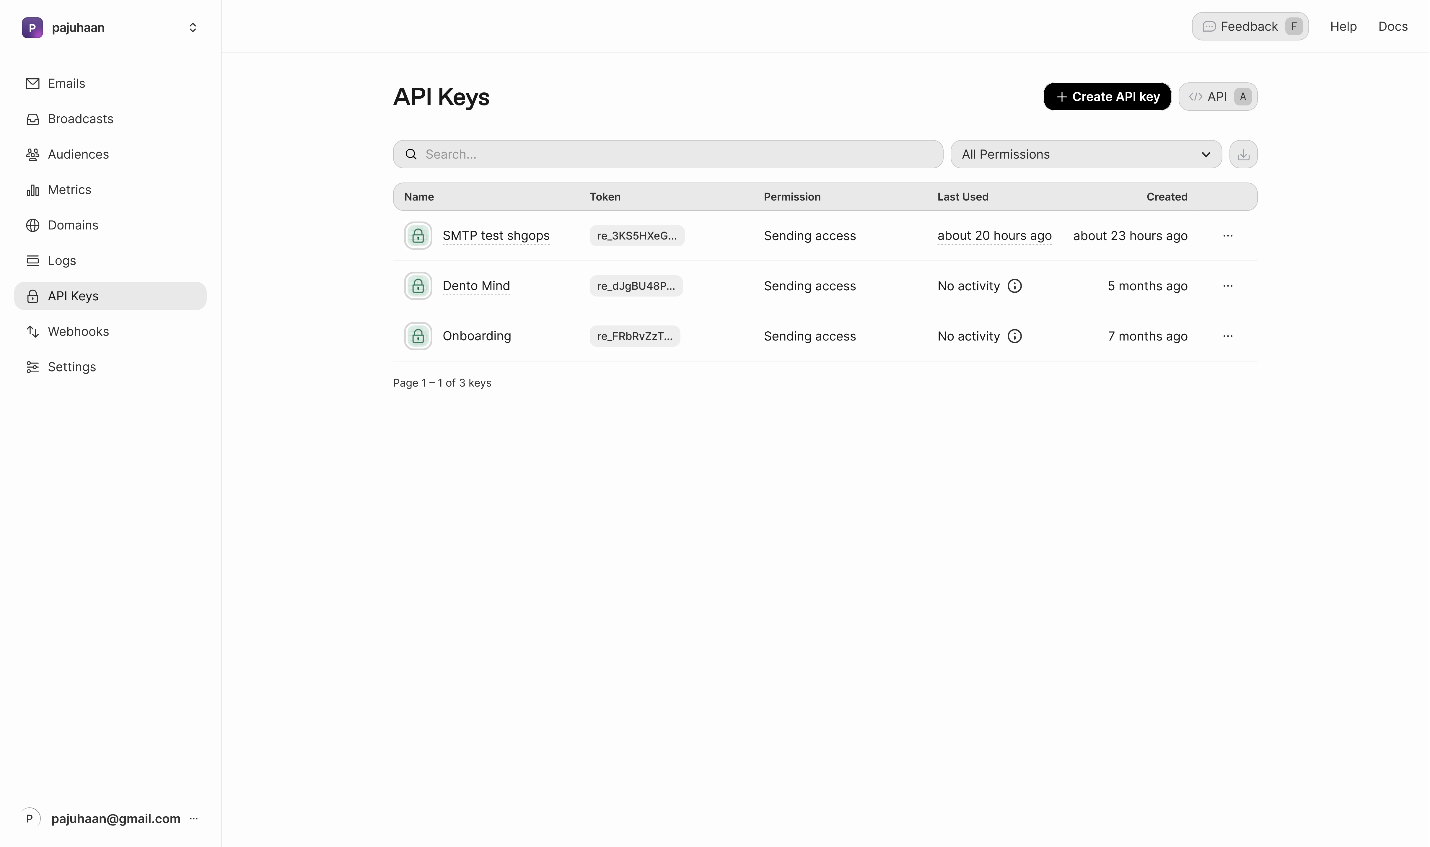
步骤 5 — 在 Selldone 配置 SMTP
在你的 Shop -> Settings -> 打开 Email,选择 SMTP 标签。启用 Custom Mail Server 并选择 SMTP 作为提供方。
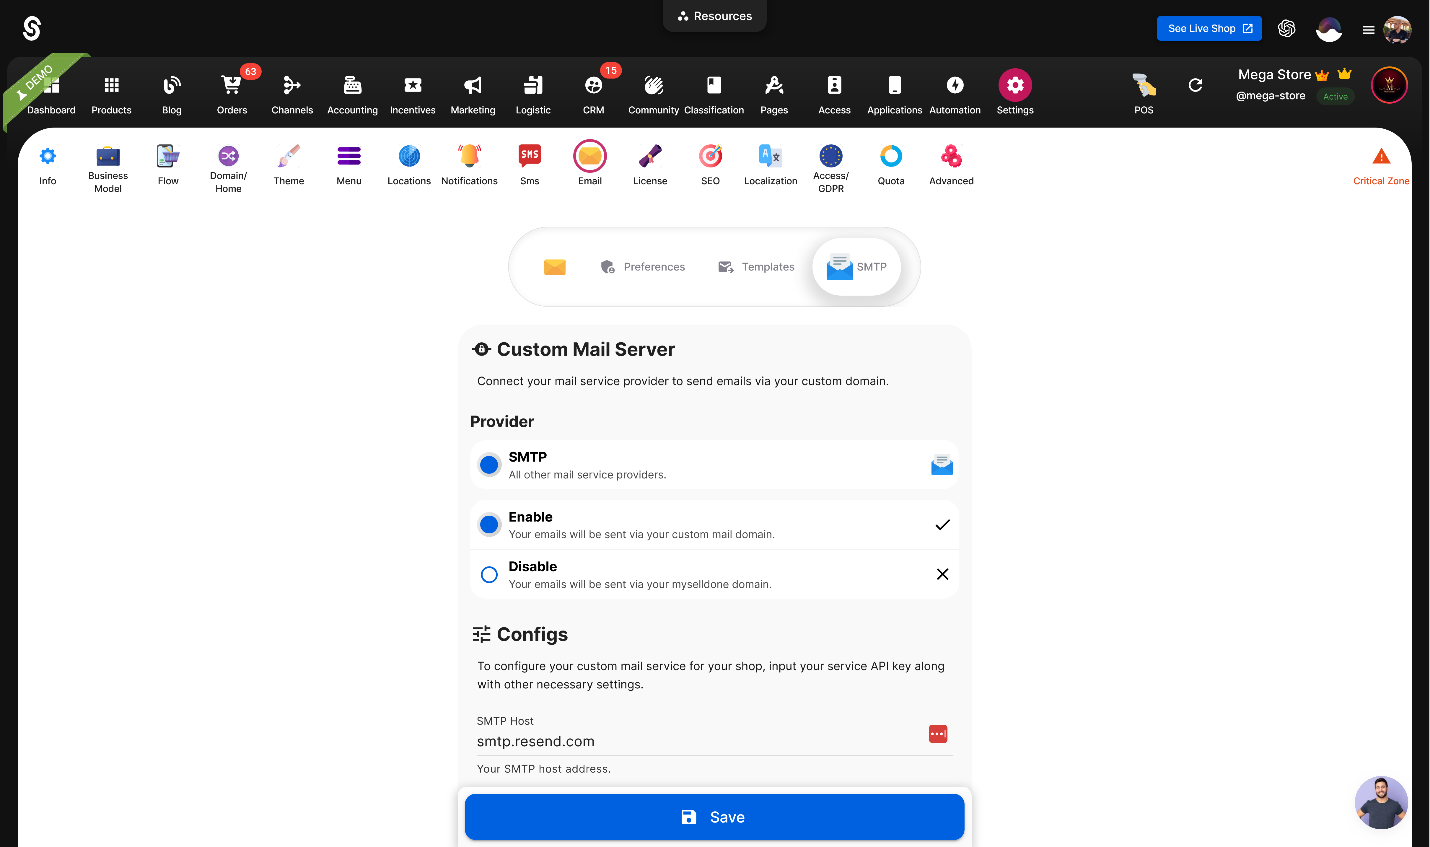
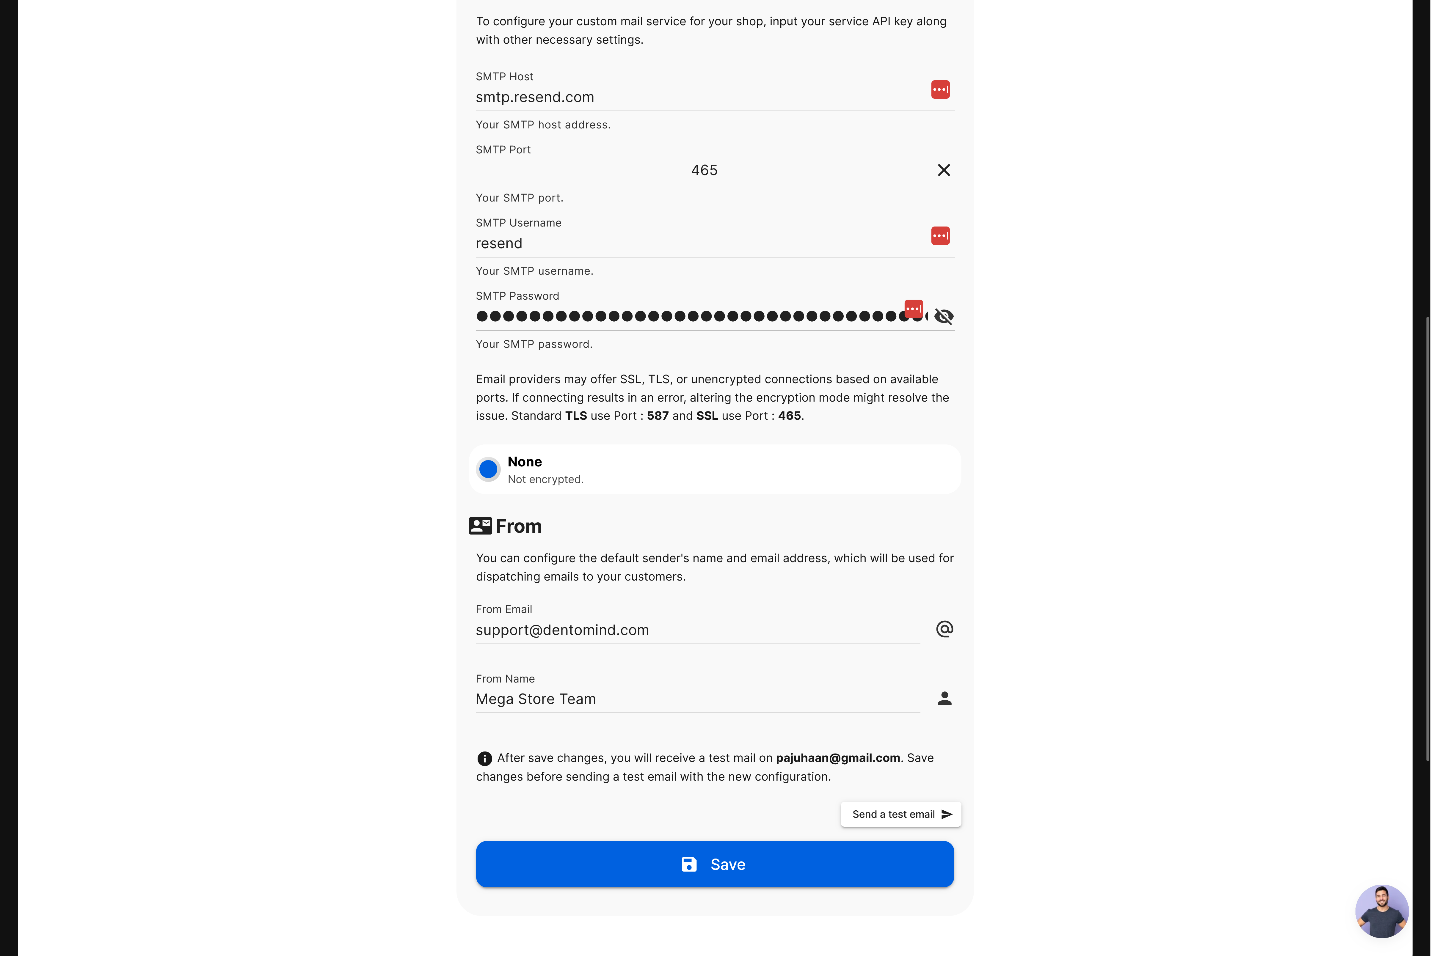
• Provider: SMTP(已启用)
• SMTP Host: smtp.resend.com
• Port 与 加密方式:
o 若选择 465,请将 Encryption 设置为 SSL
o 若选择 587,请将 Encryption 设置为 TLS/STARTTLS
• SMTP Username: resend
• SMTP Password: 粘贴你的 Resend API key
• From Email: 必须为你在 Resend 中已验证的域上的地址(例如:[email protected])
• From Name: 客户看到的显示名称(例如:你好店 团队)
点击 Save。
注意
From Email 必须与 Resend 中已 验证的域名匹配,否则邮件会被拒绝发送。
快速参考
| 字段 | 取值 |
|---|---|
| Host | smtp.resend.com |
| Username | resend |
| Password | 你的 Resend API key |
| Port + Encryption | 465 + SSL 或 587 + TLS |
| From Email | 例如:[email protected] |
| From Name | 例如:你好店 团队 |